Welcome you all to learn how to create your first LWC component. Please follow the below steps.
- Install VS Code.
- Install CLI.
- Install Salesforce Extension Pack (Expanded) extension in VS Code.
- Create a project followed by-->click on manage button or use ctl+shift+p to open command palette-->SFDX:Create Project with Manifest-->Select Standard Project template(default)-->provide project name and press enter. You will see a project got created in your left side.
- Authorize an org with created project followed by the steps-->click on manage button or use ctl+shift+p to open command palette-->SFDX:Authorize an Org-->Select Production if you are using developer sandbox or Select Sandbox if you are using sandbox-->You will be navigated to login window. Provide your credentials to login.
- Create a Lightning Web Component followed by the steps-->click on manage button or use ctl+shift+p to open command palette-->SFDX:create Lightning Web Component-->Provide the name and press enter. You will see a component created under lwc folder.
- By default 3 files got created with component. also we can add additional .js,css and other files.
- firstLWC.html
- firstLWC.js
- firstLWC.js-meta.xml
- Let's open the firstLWC.html and add the below code.
<template>
<lightning-card title="HelloWorld" icon-name="custom:custom14">
<div class="slds-m-around_medium">
<p>Hello, {greeting}!</p>
</div>
</lightning-card>
</template>
Component start and end with <template> tag. Here {} is used to bind the variable attribute.
9. Open firstLWC.js file and update the code as below.
import { LightningElement} from 'lwc';
export default class firstLWC extends LightningElement {
greeting = 'Hello World';
}
greeting is a responsive variable where this value will reflect on html page. Earlier we were using @track annotation to make a variable as responsive.
10. Open firstLWC.js-meta.xml and update the below code. This is used to configure the component.
<?xml version="1.0" encoding="UTF-8"?>
<LightningComponentBundle xmlns="http://soap.sforce.com/2006/04/metadata" fqn="firstLWC">
<apiVersion>51.0</apiVersion>
<!-- Make is true so that this component will be available to use-->
<isExposed>true</isExposed>
<targets>
<target>lightning__RecordPage</target>
<target>lightning__HomePage</target>
</targets>
</LightningComponentBundle>
Make sure you have added targets to your LWC else it won't available to use in flexi page. lightning_RecordPage and lightning_HomePage is used to expose the component to record page and home page respectively.
11. Deploy the firstLWC component to the org using the below screens.


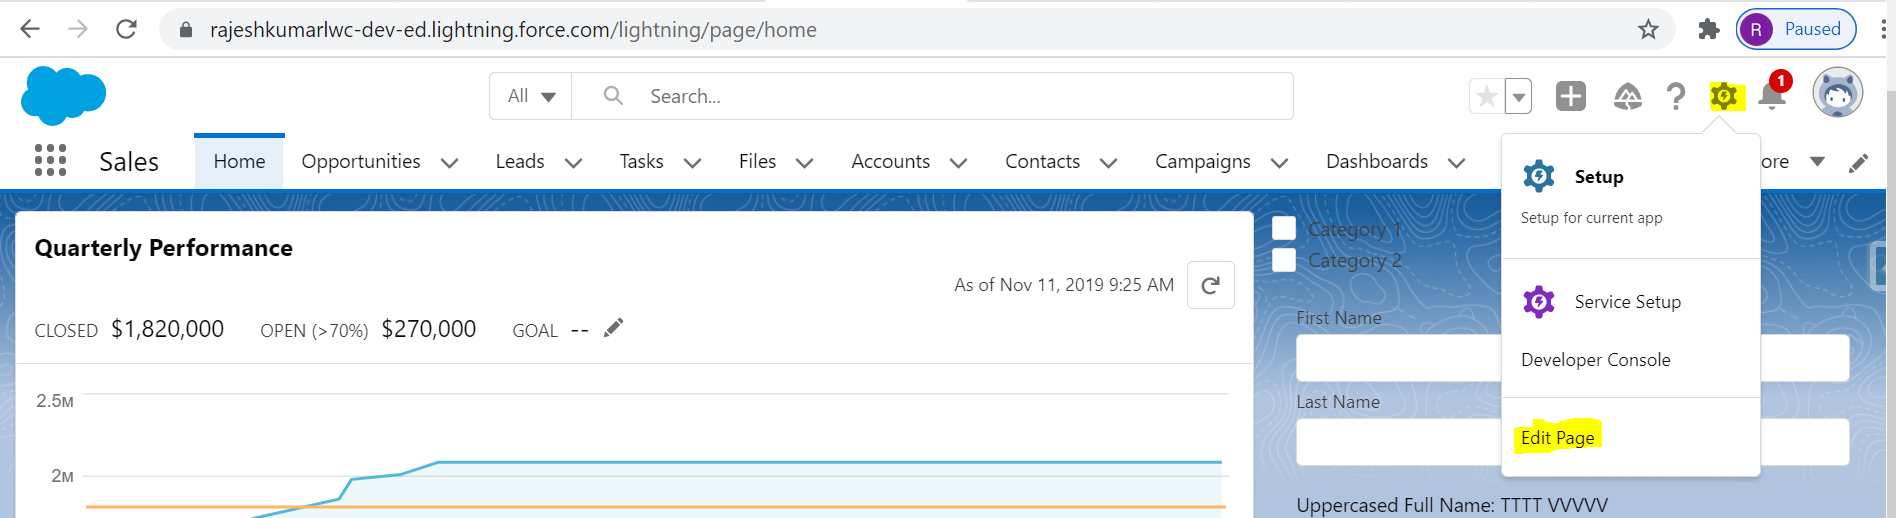
11. Let's open your salesforce developer org and open home tab similar as below.

12. Edit home tab using edit page option.

14. Go to the home tab and see your component on UI.

Hope you have created the first LWC component successfully.
Happy Learning!!
Comments
Post a Comment